Are you ready for this year’s cold winter months? Your to-do list should include dry-cleaning your winter coat, revving up home’s heating system, and learning how to winterize an above ground pool.
It’s critical to close your pool effectively so it’s protected from the winter weather’s freezing temperatures, frost, sleet, snow, etc.
Closing your above ground pool is typically a sad time for owners and swimmers. It’s also a critical time to prepare your swimming pool for Old Man Winter.
The more winterizing you do in the fall the fewer problems/costs you’ll have when springtime rolls around.
Is winterizing your pool the same as closing it? There’s some overlap but it depends on where you live. If you live in a region with cold winters then the elements will be harsher than wind and rain.
In these situations you’ll also need to protect your pool from cold temperatures and frozen precipitation.
Table of Contents
Why and When to Winterize Pool
Why Winterize Your Pool
Besides learning how to winterize above ground pool it’s just as important to know why you should take this step.
Here are some of the main ones:
1. Easier pool opening in spring
Does this mean winterizing will eliminate all work you’ll need to do when spring has sprung to get your above ground pool up and running? No, but the wintering process will help to reduce the time and effort you’ll need to get it done.
This will speed up the process so your family and friends can start taking a dip, doing mini-laps, and playing volleyball/basketball.
2. Clean water
Leaving clean water in the pool over the winter will help prevent a lot of unwanted results. Adding winterizing chemicals to your pool water will help to protect the pool during deep freezes.
It will be easier to stabilize the water when you open up the pool in the spring. That’s because the water was stabilized when you closed the above ground pool.
Products like chlorine shock and algaecide will help to keep your water crystal-clear and stabilized for the frigid winter weather.
3. Minimize repairs
Winterizing your on-ground pool can help to reduce the number of repairs you’ll need to do when you open it in spring/summer. That’s because the pool will have better protection from the elements.
4. Protect Liner
Besides the swimming pool itself the liner is another key component. It’s important to protect this item from winter and you can do that by winterizing your pool.
When the water is clean that in turn will protect the liner and help prevent rips/tears. This can help prevent the cost of replacing the liner in the springtime.
5. Save money
You can save money in various ways by winterizing your above ground pool. For example, when you remove the pool cover you’ll have less work to do to get your pool ready for the next season. Fewer tasks and equipment means lower costs.
You can also help prevent repairs that are more likely if you don’t winterize your pool. These costs can be quite costly and in a worst-case scenario would require repairs so high it would be better to shop around for a new swimming pool.
6. Protect investment
As with any other big investments it’s important to protect them. Yes, and above ground pool is significantly cheaper than an in-ground unit. However, you’ll still need to put in the work to protect your investment.
Winterizing your pool won’t be free but it’s much cheaper than replacing key components or the swimming pool itself. You can protect your investment by closing/winterizing your pool properly and also avoid spending weeks getting it up to par during the following spring.
7. Peace of mind
This is an X-factor since it’s not directly related to the pool. If you take steps to winterize your on-ground pool it will help minimize the maintenance/repairs you’ll need to do when opening your pool in the spring or summer.
Keep in mind you’ll still need to do some work when the weather breaks. However, there’s no need to be a worry wart during the cold winter months since you’ll know you’ve taken the necessary steps to minimize debris/damage when the thermometer mercury starts plummeting.
When to Winterize Pool
Another key issue related to how to winterize above ground pool is when to winterize your swimming pool.
This question is related to when you should close your pool. It’s highly recommended to take this step before the temperatures start dipping below freezing.
When will the first winter freeze? There’s no way to know that but you can approximate it based on the climate in the region of the world where you live. Remember that nothing is 100%.
So it’s best to be on the safe side and winterize your pool months before the first freeze usually happens.
This won’t really have a negative effect on your swimming time. If you live in a 4-season climate then you’ll be dealing with cooler temperatures and falling leaves in the autumn.
So it won’t be much of a sacrifice to winter-proof your pool in September/October.
Prep Step: Collect Supplies Needed
As when doing other pool-related tasks like opening or vacuuming your above ground pool it’s critical to have all the tools needed to make sure the process of winterizing the unit is as effective and efficient as possible.
Here are some of the most important equipment/materials to prepare before you get started:
Chlorine Shock
This is one of the most critical products to use when winterizing your pool. A chlorine shock is used to kill unwanted microbes like bacteria and algae, which brings down the level of “free chlorine.”
A chlorine shock is something you should do to your pool about once a week while the pool is open. So it’s definitely a step to take when preparing your above-ground pool for the wintertime.
The step helps to boost the chlorine’s sanitizing power so it’s more effective in zapping unwanted microorganisms in your pool water.
Make sure to cover the pool after the chlorine shock or do the process at night. The reason is the sun can break down chlorine, which is something you’ll certainly want to minimize for your pool.
No products found.
Wall/Floor Brush
In learning how to winterize above ground pool this is another important tool you should secure. You can find many items available at online retailers like Amazon.
These tools are effective in brushing off debris from the pool’s walls and floor. Make sure the unit is made of a sturdy material like aluminum, which will help to extend the brush’s lifespan.
The bristle should be sturdy and made of materials like nylon to maximize their cleaning power.
Another key factor is how ergonomic the brush is. This will help make it easier to operate the brush and especially when you spend hours scrubbing off stuff from the pool’s walls and floor.
A related issue is whether the unit fits your telescope pole, which will affect the functionality of the tool.
No products found.
Skimmer Net
This is a must-have item to secure for your above-ground pool. It’s an effective tool whenever you see items like leaves and twigs in your pool.
Make sure to pick a sturdy unit with the net made of durable materials like nylon. The net should also be super-fine so you can pick up tiny stuff like bugs.
Sometimes a telescopic pole is bundled with the skimmer net. This adds more value since you’ll likely need the pole anyway for your pool’s skimmer and brush.
As always make sure to consider the overall quality of the set to make sure you’re investing in a quality pole/net combo.
When picking a net make sure to get the best combination of durability, functionality, and safety. The net should be sturdy so it can withstand contact with various types of debris.
A fine mesh will make the net more functional since it can pick up itty-bitty debris floating in your pool. In terms of safety look for nets with plastic frames that won’t damage pool liners.
No products found.
Pool Cover
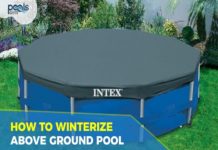
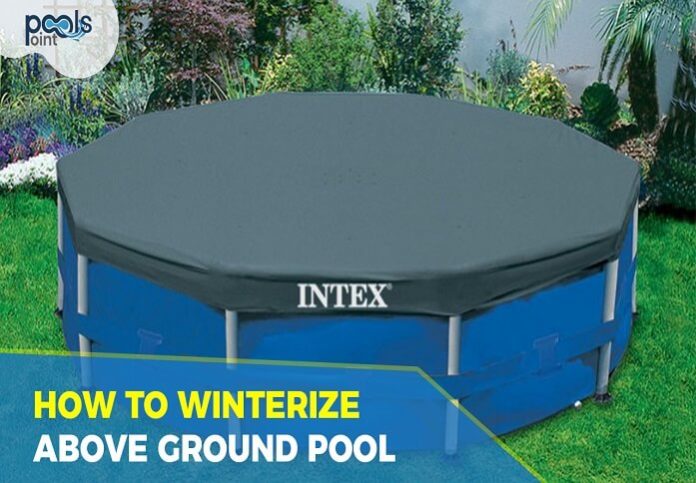
This is easily one of the most important items you’ll need for learning how to winterize above ground pool. It’s an effective item to keep leaves, twigs, and other debris off the pool during the fall and summer.
When picking a cover start with the durability and coverage. Learn your pool’s exact dimensions so you can select an on-ground pool cover that provides 100% coverage.
This will help to make sure dirt and debris doesn’t drop into the pool, which is definitely something you’ll want to avoid. The hardware should also be made of durable materials like stainless steel.
A mesh panel is also a key feature to look for. This will keep out dirt/debris from dropping into the pool while letting water drain from the cover. This is critical since standing water atop the cover can cause problems like algae or damage to the cover itself.
Another factor to consider is how effectively the cover protects your pool from the elements.
For example, if you’re winterizing your pool you should look for units that provide protection from wind, rain, sun, snow, and ice. A cover that protects your pool from those elements will help to provide exhaustive protection during the cold-weather months.
No products found.
Stain Remover
This type of cleaning product will help to remove stains on your pool and help prevent future ones. You can usually add it to vinyl liners to keep the material looking fresh and sparkling.
The main feature to look for is a product that’s effective in removing stains on your pool’s liner.
You should also pick a product that doesn’t leave behind phosphates in the pool water. That would offset any benefits you get from a stain-free pool.
Phosphates can originate from various sources like municipal water, decaying vegetation, cosmetic products. Pool chemicals from products like stain removers can also contain phosphates.
So when picking a product make sure it won’t leave behind any phosphates.
No products found.
Water Test Kit
Here’s another product you consider when figuring out how to winterize above ground pool. This type of kit tests various things like levels of pH, alkalinity, chlorine, etc.
It’s critical for your pool’s water to be chemically balanced so this is a test you should conduct frequently.
These test kits are affordable and you can find several products at online retailers like Amazon. Make sure to research what’s actually included in the kit.
It’s better to pick one that includes comprehensive tests to get the best results.
These kits tend to be affordable with several of them in the under-$10 category. That said, your pool water’s chemical balance is important so make sure you get a kit that’s complete and accurate.
When winterizing your pool it won’t be the last time you use the test kit. However, it’s one time you should definitely conduct the tests when preparing your on-ground pool for the cold winter months.
No products found.
Algaecide
This type of chemical treatment is used for swimming pools and other structures like fish ponds. Algae buildup in pools can cause the water to become cloudy, which is a situation you’ll definitely want to treat as soon as possible.
In fact, in some cases algae can even cause a layer of scum over the pool water’s surface. This prevents sunlight from sanitizing the water effectively.
This situation could actually become quite dangerous. That’s because it can result in the “red tide” effect. While some algae is harmless other types are actually toxic and can cause health issues for humans.
Another plus of algaecide is it also reduces how much chlorine the pool owner has to add to the water for purification. This in turn makes the pool more pleasant for swimming due to the side-effects of chlorine contact like stinging eyes/noses.
You can find many algaecide products available that can be shipped to you through programs like Amazon Prime. Make sure to find a product that’s right for your swimming pool.
No products found.
Telescopic Pole
This is a key component for using brushes and skimmers to clean your pool. When picking a pole make sure it allows you to reach the center of the pool. A good pole length to look for is 20+ feet.
The pole’s durability is also critical so look for sturdy materials like heavy-duty aluminum. This will extend the lifespan of the pole so you can use it season after season. Like other items it’s a plus if they last for several swimming seasons.
No products found.
Pool Vacuum
This is one of the most important items you’ll need when mastering how to winterize above ground pool. This unit works by collecting debris via the vacuum head. It then travels through the hose to the filtration system.
The main benefit of this process is you can clean the pool’s sides/floor instead of just filtering the pool’s H2O. the unit is designed like a home vacuum cleaner so it can moved around easily.
The pool vacuum uses the pool’s filter in a different way. This time the suction is used to remove debris on the sides and floor of the pool like dirt, bugs, leaves, etc.
After removing those items you’ll just need to use a garden hose later to clean the swimming pool’s filter.
When picking a vacuum the main types to pick from are manual and automatic/robotic. A manual vacuum is cheaper but will require some manual labor by the operator.
A robotic vacuum is significantly more expensive but is a cinch to use. So when picking one or the other think about whether you’re willing to pay a higher price tag for more convenience.
No products found.
Step 1: Clean/Dry/Store Pool Accessories
Here’s the first step to take when preparing your pool for winter.
1. Use basic hand tools to remove accessories/components
That includes items like the pump/filter, step leader, hose pipes, and skimmer. You won’t need a full-size toolbox but should have some basic hand tools with you to complete the task.
2. Wash all the items completely
3. Dry the items
4. Store at room temperature
Just as you’ll want to protect your above-ground pool for the winter season it’s important to safeguard the components from cold-weather temperatures.
Make sure the items are stored in places like a heated garage so they’ll be protected from the elements.
Step 2: Adjust Water’s pH, Alkalinity & Calcium Levels
Here’s the next step for how to winterize above ground pool. It requires you to secure a water test kit first.
- Test pH levels
- Test total alkalinity
- 3. Test calcium hardness
Step 3: Shock Pool Water
1. Put on protective gear
This includes various items including:
- Protective gloves
- Protective eyewear
- Closed-toe shoes
- Pants/long-sleeve shirt
2. Test free chlorine (FC)/total chlorine (TC)
This helps to determine the amount of combined chlorine (CC). These figures show the amount of chlorine shocking you must do.
3. Read the shock treatment’s instructions
This typically includes steps/charts to determine the amount of shock you need. You’ll have to do some basic math so the process isn’t too difficult.
4. Dissolve the shock (as necessary)
If this is required then fill a 5-gallon bucket about three-quarters full using warm water. Then add the shock to the bucket. Stir slowly until chemicals are dissolved well. Do the work in 1-pound increments.
5. Pour the shock into your pool
Make sure to walk around the above-ground pool for this process to make the distribution even. If solid particles drop to the bottom dissolve them before pouring the shock into the pool.
6. Wait to use the pool as per the chlorine shock’s directions
This will prevent your eyes/skin from getting irritated and your swimsuit from bleaching.
7. Store unused shock carefully
It’s important to store the chlorine shock correctly. This will help to avoid possible accidents. Read the manufacturer’s directions for guidance to avoid possible accidents/injuries.
Step 4: Clean Pool
1. Remove leaves, bugs, and algae
Make your pool’s water as clean and sterilized as possible. That’s because such debris will absorb various chemicals like algaecide. This in turn will make it tougher to keep your pool water clean during the winter months.
2. Do a final skim of water’s surface
This might seem redundant if you’ve already skimmed the surface while winterizing the pool. However, it’s critical to remove as much debris as possible before you complete the process and cover the pool for the winter months.
Step 5: Lower Pool’s Water Level
As you near the last steps for how to winterize above ground pool this is a key action. The goal is to lower the water below the skimmer’s mouth. Water could freeze at the skimmer’s throat so it’s critical to remove any H2O there.
Step 6: Cover the Pool
1. Use cover clips
This helps to prevent strong winds from blasting the cover from the side.
2. Check the cover for holes
This helps to prevent rain/melted snow from dropping into the pool water.
3. Add an air pillow below pool cover
This raises the pool cover to the middle of the pool. It keeps the rain from entering the pool. It also functions as an ice equalizer to keep an ice sheet that forms in the pool from being too solid.
Step 7: Remove Pump/Filter System
1. Clear the pump/filter
Store the items inside your home when possible.
2. Remove components of cartridge-type pool filter
Let the items dry then add to filter tank.
CONCLUSION
So there you have it! The process of learning how to winterize above ground pool is crucial yet practical. Correctly closing your pool in autumn will make it easier to open in spring!


