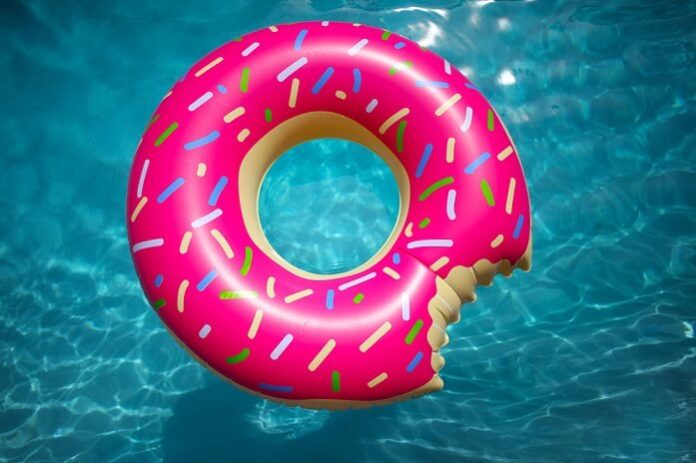
Swimming in a pool in a hot summer is incomplete without beautiful pool floats and toys to accompany you and your family. You can find many types of alluring floats available in stores.
Undoubtedly, these products are enjoyable, but the task of cleaning and storing them after usage is daunting. Once you and your family has completed their enjoyable pool activities, the tedious work of cleaning these floats is necessary to avoid mildew and mold.
Thus, this guide has been prepared to ensure a systematic demonstration of proper cleaning and storage of your swimming pool floats. So, let us get started with this guide explaining how to clean pool floats.
Table of Contents
Step 1. Deflating the floats
Cleaning a float while it is inflated with air can be tough, as the curves and folds in the pool toy will not let you clean the whole unit properly. Thus, you will have to deflate them before proceeding.
Now, some toys may have a valve, or valves, which you can unplug to let the air come out naturally. However, some devices may have a sticky valve to retain the air even when the plug is unplugged. This mechanism is a there to avoid accidental deflations of such toys.
Therefore, the problem is that you will have to press the float firmly to let the air pass out. This process not only takes a lot of time but also exhausts you.
A better method is to use a rigid straw or thin screwdriver to poke the inside of the valve carefully so that the air can pass out without pressing the float forcefully. You may have to be careful while poking the plug hole so that the float is not damaged.
Now, let us move to the actual process of cleaning the toy.
Step 2. Cleaning the Pool Float
This method comprises many methods that help in cleaning the pool floats. You can choose the right one for your dirty swimming pool toys and apply it to clean them properly.
Before this guide takes you to the actual methods, you should understand the three necessary steps of cleaning involved in any of the plans.
- Removal of excess water from the deflated float.
- Brushing with the cleaning agent (this will be discussed in the methods mentioned below).
- Drying the floating toy.
All methods that are meant to help clean a pool float toy involve the use of these fundamental steps.
The below-mentioned methods are intended to offer a varying level of cleaning for the floats depending upon the level of the stubbornness of the stains on the toys.
Thus, the following methods for helping you out are:
Natural cleaning methods
These simple methods involve the use of soap solutions, vinegar, baking soda, etc. to clean the pool products. Also, you may require the use of a sponge, a dry cloth, and warm water.
Such methods do not need the use of harsh chemicals or disinfectants to clean the material of the float.
Here are the natural methods for cleaning pool-floating units by the use of natural agents.
Method 1. Using Soap Solution
Step 1: Start by creating a solution containing, 1 part of soap solution and three parts of warm water in a mug.
Step 2: Make sure your float is wholly deflated from the air before moving with the cleaning part.
Step 3: Initiate by dipping a dry sponge piece in the solution and then start scrubbing the surface of the pool toy. Eventually, it should remove the dirt stains from the float’s surface.
Step 4:Use a garden hose or bucket to throw some clean water on the soapy float. It will remove the stains.
Step 5:Afterward, use a dry and clean piece of cloth to absorb the wet surface of the pool toy.
Step 6:That should clean the float.
Method 2. Using Vinegar Solution
This method also comes under techniques that require natural ingredients to clean your pool equipment. Follow the below mention steps for it to work correctly.
Step 1: Start by mixing one portion of white vinegar and two parts of warm water. This solution is needed for dissolving unnecessary residue formation due to the acidic nature of vinegar or dirt particles.
Step 2: When the solution is prepared, submerge the deflated toy in it for the next 10 to 15 minutes. Soaking it in the solution will make sure that the solution enters the insides of the floating unit for complete cleanup.
Step 3: Now, use a brush or sponge or loofa scrubber to scrub off the item. You may want to use a small brush to reach all sides of the unit.
Step 4: Now, rinse the toy with water properly.
Step 5: Next, use a dry cloth or towel to clean the water present on its surface.
Step 6: Lay it down so that it can dry in natural air. Make sure that the toy is laid upright so that the excess water inside or on the surface can drain out.
Step 6: Now, start using it again or store it for the next activity.
Method 3. Using Baking Soda Solution
Here is another simple technique that involves the use of common ingredients present in your home. Follow the below mentioned steps for it.
Step 1: Start the process by mixing warm water (1 quart) with one-fourth of baking soda. Using baking soda will help you clean the dirt stains from the float naturally.
Step 2: Now, soak a sponge in the solution and start scrubbing over the surface of the float.
Step 3: Once you have adequately scrubbed, rinse the surface with water from a bucket or garden hose. If the floating unit is small, then it is recommended to soak the entire item in the solution for maximum cleaning effect. With the baking soda solution, you can remove the dirt stains, algae, and other pollutants off the surface of the float.
Step 4: After that, use a dry towel or cloth to remove the moisture from the surface of the item.
Step 5: Let it dry in an upright position in the natural air. Do not dry in direct sunlight as it can ruin the material of the floating unit.
Step 6: Your clean pool toy is ready to be used safely once again!
Method 4: Deep or Chemical Cleaning Method
If your swimming pool toys have become very dirty, then you may require a method where it involves the use of chemical agents. One of the most commonly used agents for this process is bleach (chlorine).
Remember that this method should be used only when the unit starts molding slightly. Use of chlorine bleach will help sanitize the surface of the float.
However, you should use it in the right amount, as it can be harmful to children. Besides, use chlorine bleach solution for cleaning only as your last resort. Here are the steps for it:
Step 1: Start by preparing the solution comprising of 1-gallon water and 2 tbsp. Bleach chlorine.
Step 2: Submerge the toy float in the solution for the next 2 – 3 minutes to let the bleach solution do its job.
Step 3: Take the product out of the solution and use a sponge or brush to scrub the surface if the stains are still present on it.
Step 4: Rinse it with regular water to remove the traces of the chemical from its surface.
Step 5: Use a dry towel or a piece of cloth to wipe off the water from the surface of the float.
Step 6: Let the float dry in the air in a standing position.
Step 7: Use the item once again after they are dry.
Remember that this method is also suitable for plastic and foam-based floats that do not need air inside them. Nevertheless, the porosity of a foam-based toy easily molds over time so that it may require proper cleaning. If there is heavy molding, then it is best to replace the toy with a new one.
Method 5: Storing the Pool Toys
Whether you own an above ground swimming pool or an in-ground one, you are going to need a proper storage area for your pool floats and other pool accessories.
Harsh and hot summer weather may damage the material of pool toys gradually if you do not store them properly.
Here are some tips to save them correctly after you are done with the entertaining activities at your pool.
Step 1: Make sure to deflate and clean the pool floats before storing them.
Step 2: Rinse the floats properly and dry them before storing.
Step 3: Use an ample, but enclosed space for storing these items.
Step 3: Ensure that the storage location is arid at all times to avoid unnecessary molding.
Step 4: Always use a bleach solution to wipe off the surface of the floats if you are planning to store them away after the summers are over. That will make sure that the unit does not populate with bacteria and other germs.
Bottom Line
Your swimming pool incorporates many accessories for enhancing your experience in hot summers. Just remember that the items that you are using are adequately maintained for improving their longevity.
After all, you do not want to face a situation where all your pool floats and equipment are messed up once you plan a pool party next summer. Hopefully, you have understood how to clean pool floats efficiently so that you can enjoy these recreational tools in your pool activities every day.


